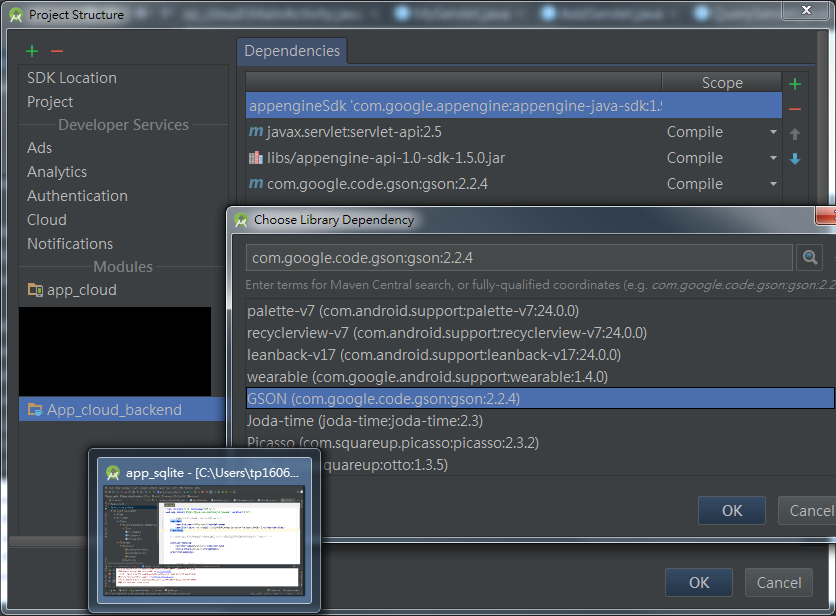
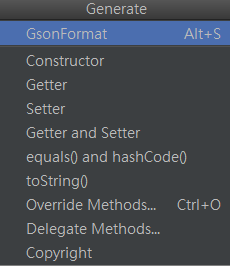
可是很多人project structure常常缺乏這個選項 ,當然可以自己在manifests增設權限、加libs~~
如圖:
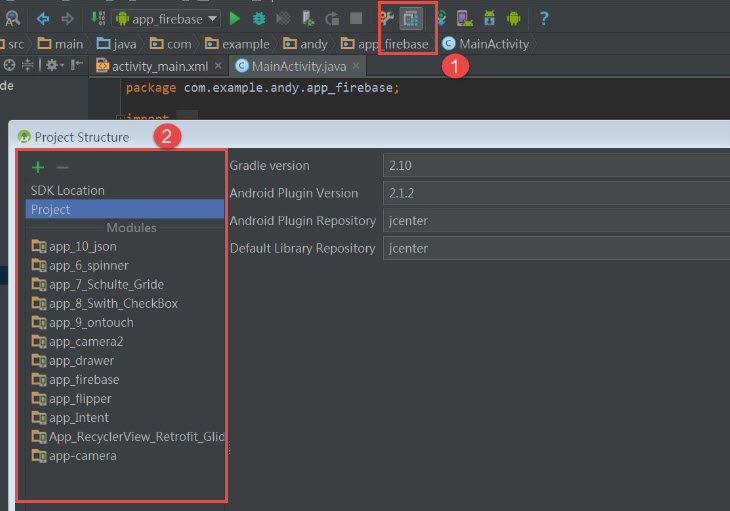
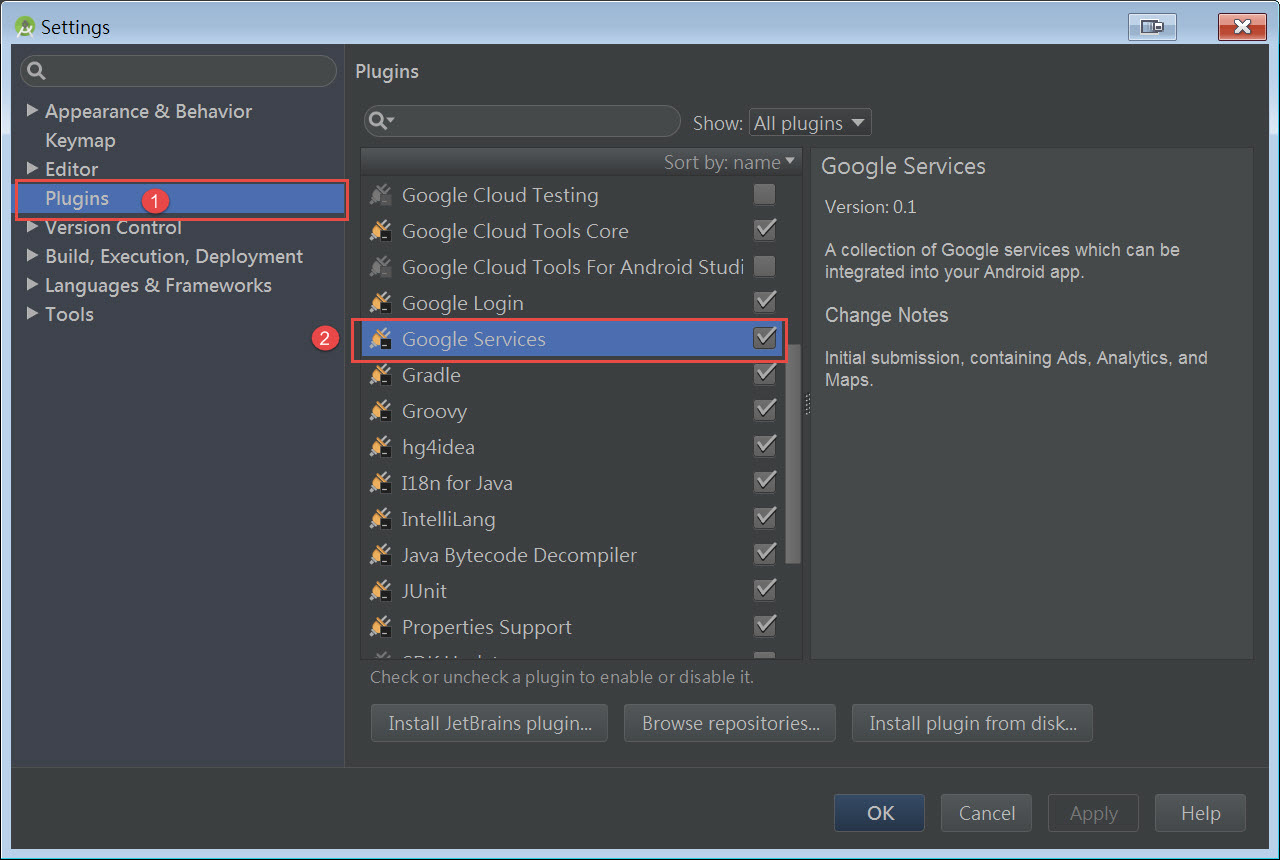
解決方式


這樣就完成囉!


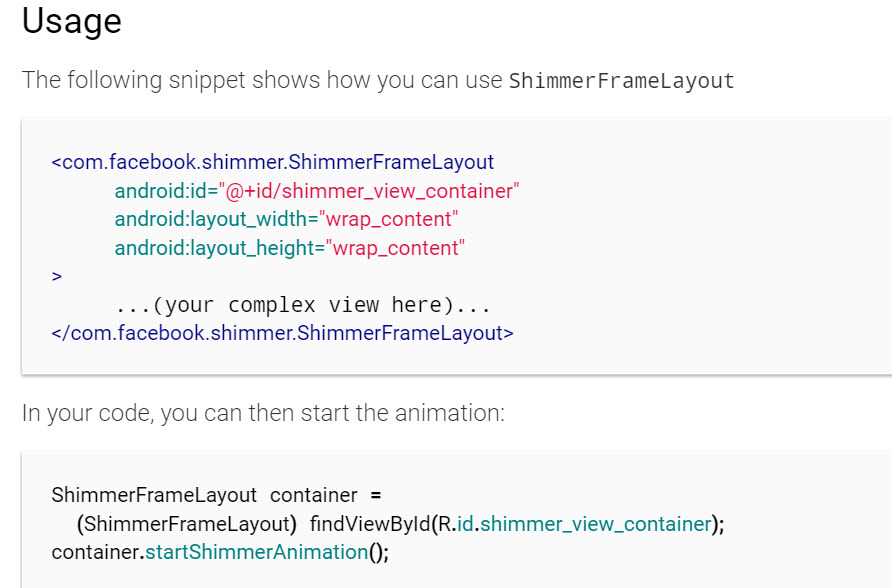
<?xml version="1.0" encoding="utf-8"?> <LinearLayout xmlns:android="http://schemas.android.com/apk/res/android" xmlns:tools="http://schemas.android.com/tools" android:layout_width="match_parent" android:layout_height="match_parent" android:background="@android:color/background_dark" android:orientation="vertical" android:paddingBottom="@dimen/activity_vertical_margin" android:paddingLeft="@dimen/activity_horizontal_margin" android:paddingRight="@dimen/activity_horizontal_margin" android:paddingTop="@dimen/activity_vertical_margin" tools:context="com.example.tp1606008.app_function.MainActivity"> <com.facebook.shimmer.ShimmerFrameLayout android:id="@+id/shimmer_view_container" android:layout_width="wrap_content" android:layout_height="wrap_content"> <TextView android:id="@+id/tv_message" android:layout_width="wrap_content" android:layout_height="wrap_content" android:text="就是要帥~~!!!!" android:textColor="@android:color/holo_red_dark" android:textSize="50dp" /> </com.facebook.shimmer.ShimmerFrameLayout> <com.facebook.shimmer.ShimmerFrameLayout android:id="@+id/shimmer_view_container2" android:layout_width="wrap_content" android:layout_height="wrap_content"> <TextView android:layout_width="wrap_content" android:layout_height="wrap_content" android:text="就是要帥~~!!!!" android:textColor="@android:color/holo_purple" android:textSize="50dp" /> </com.facebook.shimmer.ShimmerFrameLayout> <com.facebook.shimmer.ShimmerFrameLayout android:id="@+id/shimmer_view_container3" android:layout_width="wrap_content" android:layout_height="wrap_content"> <TextView android:layout_width="wrap_content" android:layout_height="wrap_content" android:text="就是要帥~~!!!!" android:textColor="@android:color/holo_blue_bright" android:textSize="50dp" /> </com.facebook.shimmer.ShimmerFrameLayout><com.facebook.shimmer.ShimmerFrameLayout android:id="@+id/shimmer_view_container4" android:layout_width="wrap_content" android:layout_height="wrap_content"> <TextView android:layout_width="wrap_content" android:layout_height="wrap_content" android:text="就是要帥~~!!!!" android:textColor="@android:color/holo_green_light" android:textSize="50dp" /> </com.facebook.shimmer.ShimmerFrameLayout> </LinearLayout>
package com.example.app_function;

import android.animation.ObjectAnimator;
import android.os.Bundle;
import android.support.v7.app.AppCompatActivity;
import android.widget.TextView;
import com.facebook.shimmer.ShimmerFrameLayout;

public class MainActivity extends AppCompatActivity {
   private ShimmerFrameLayout mShimmer;
   private ShimmerFrameLayout mShimmer2;
   private ShimmerFrameLayout mShimmer3;
   private ShimmerFrameLayout mShimmer4;

   @Override
   protected void onCreate(Bundle savedInstanceState) {
       super.onCreate(savedInstanceState);
       setContentView(R.layout.shimmer_view);
       findId();
       shimmer();
   }

    //Step1:先findViewById找到View
   public void findId(){
       mShimmer  = (ShimmerFrameLayout)findViewById(R.id.shimmer_view_container);
       mShimmer2 = (ShimmerFrameLayout)findViewById(R.id.shimmer_view_container2);
       mShimmer3 = (ShimmerFrameLayout)findViewById(R.id.shimmer_view_container3);
       mShimmer4 = (ShimmerFrameLayout)findViewById(R.id.shimmer_view_container4);
   }

   public void  shimmer(){
       //Step2:開始設定mShimmer效果 (效果的參數 文章下方或官網都也有介紹)
 style="line-height: normal;">       mShimmer.setDuration(5000);
       mShimmer.setRepeatMode(ObjectAnimator.REVERSE);

        //設定mShimmer2效果
       mShimmer2.setBaseAlpha(0.1f);
       mShimmer2.setDropoff(0.1f);
       mShimmer2.setTilt(5);
       mShimmer2.setDuration(4000);

        //設定mShimmer3效果
       mShimmer3.setAngle(ShimmerFrameLayout.MaskAngle.CW_90);
       mShimmer3.setDuration(4000);

        //設定mShimmer4效果
       mShimmer4.setBaseAlpha(0);
       mShimmer4.setDuration(5000);
       mShimmer4.setDropoff(0.1f);
       mShimmer4.setIntensity(0.35f);
       mShimmer4.setMaskShape(ShimmerFrameLayout.MaskShape.RADIAL);
   }

   @Override
   protected void onStart() {
       super.onStart();
   }

   @Override
   public void onResume() {
       super.onResume();
        //Step3:開始執行
       mShimmer.startShimmerAnimation();
       mShimmer2.startShimmerAnimation();
       mShimmer3.startShimmerAnimation();
       mShimmer4.startShimmerAnimation();
   }

   @Override
   public void onPause() {
        //Step4:onPause的時候記得暫停
       mShimmer.stopShimmerAnimation();
       mShimmer2.stopShimmerAnimation();
       mShimmer3.stopShimmerAnimation();
       mShimmer4.stopShimmerAnimation();
       super.onPause();
   }
}
Attributes
You can control the look and pace of the effect using a number of custom attributes on the
ShimmerFrameLayout tag. Alternatively, you can set these values on the layout object itself. For a comprehensive list, check out the API reference
|
JAVA:MyBook
|
package com.example.myapplication.backend.po;

 public class MyBook {
   private long key;
   private String title;
   private String author;
   private int price;
   private long time;

 //設定好需要的變數後,剩下的用getter setter產生

    public long getKey() {
       return key;
   }
    public void setKey(long key) {
       this.key = key;
   }
    public String getTitle() {
       return title;
   }
    public void setTitle(String title) {
       this.title = title;
   }
    public String getAuthor() {
       return author;
   }
    public void setAuthor(String author) {
       this.author = author;
   }
    public int getPrice() {
       return price;
   }
    public void setPrice(int price) {
       this.price = price;
   }
    public long getTime() {
       return time;
   }
    public void setTime(long time) {
       this.time = time;
   }
}
|
JAVA:QueryServlet
|
package com.example.myapplication.backend;

import com.example..myapplication.backend.po.MyBook;
import com.google.appengine.api.datastore.DatastoreService;
import com.google.appengine.api.datastore.DatastoreServiceFactory;
import com.google.appengine.api.datastore.Entity;
import com.google.appengine.api.datastore.Query;
import com.google.gson.Gson;
import java.io.IOException;
import java.util.ArrayList;
import java.util.List;
import javax.servlet.http.HttpServlet;
import javax.servlet.http.HttpServletRequest;
import javax.servlet.http.HttpServletResponse;

 public class QueryServlet extends HttpServlet {

    @Override
   public void doGet(HttpServletRequest req, HttpServletResponse resp)
           throws IOException {

        resp.setContentType("text/plain");

        DatastoreService ds = DatastoreServiceFactory.getDatastoreService();

        //查詢 資料表
       Query q = new Query("Book");

         //想辦法把取得的資料 裝進陣列中

        List<mybook> list =new ArrayList<>();

        for (Entity entity : ds.prepare(q).asIterable()) {
           //封裝資料
           MyBook myBook = new MyBook();
           myBook.setKey(entity.getKey().getId());
           myBook.setTitle(entity.getProperty("title").toString());
           myBook.setAuthor(entity.getProperty("author").toString());
           myBook.setPrice(Integer.parseInt(entity.getProperty("price").toString()));
           myBook.setTime(Long.parseLong(entity.getProperty("time").toString()));

            list.add(myBook);
       }

        Gson gson = new Gson();

        String json = gson.toJson(list);

        resp.getWriter().println(json);

        //我們需要把資料轉換成GSON的格式,方便APP下載
       Runnable r = new Runnable() {
           @Override
           public void run() {

            }
       };
   }
}
|

compile 'com.google.code.gson:gson:2.2.4'
compile 'com.github.bumptech.glide:glide:3.7.0'
compile 'com.squareup.okhttp:okhttp:2.0.0'
|

Class
|
JsonAdapter (因為json沒有Adapter,所以我們要自己做一個Adapter)
|
Layout
|
Item.xml (用來顯示每筆資料用的item)
|
model
|
Servive_My_Book(管理資料,解除耦合)
|
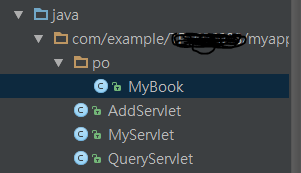
po
|
MyBook(用來對應到網路上json格式用), po這個資料夾命名 代表永續儲存。
|


Layout:activity_main
|
<?xml version="1.0" encoding="utf-8"?>
<LinearLayout xmlns:android="http://schemas.android.com/apk/res/android"
xmlns:tools="http://schemas.android.com/tools"
android:background="@android:color/holo_green_light"
android:layout_width="match_parent"
android:layout_height="match_parent"
android:paddingBottom="5dp"
android:orientation="vertical"
android:paddingLeft="5dp"
android:paddingRight="5dp"
android:paddingTop="5dp"
tools:context="com.example.app_cloud.MainActivity">
<ListView
android:layout_marginTop="20dp"
android:layout_width="match_parent"
android:layout_height="match_parent"
android:layout_weight="2"
android:id="@+id/listView"
android:layout_alignBottom="@+id/webView"
android:layout_alignParentLeft="true"
android:layout_alignParentStart="true" />
</LinearLayout>
|
Layout:item
|
<?xml version="1.0" encoding="utf-8"?>
<LinearLayout xmlns:android="http://schemas.android.com/apk/res/android"
android:layout_width="match_parent"
android:layout_height="wrap_content"
android:background="@android:color/darker_gray"
android:orientation="vertical"
android:weightSum="1">
<TextView
android:id="@+id/tv_key"
android:layout_width="match_parent"
android:layout_height="wrap_content"
android:layout_margin="5dp"
android:layout_weight="0.06"
android:text="key"
android:textAppearance="?android:attr/textAppearanceLarge" />
<LinearLayout
android:layout_width="match_parent"
android:layout_height="wrap_content"
android:orientation="horizontal">
<TextView
android:id="@+id/tv_title"
android:layout_width="wrap_content"
android:layout_height="wrap_content"
android:layout_margin="5dp"
android:text="title"
android:textSize="10dp" />
<TextView
android:id="@+id/tv_author"
android:layout_width="wrap_content"
android:layout_height="wrap_content"
android:layout_margin="5dp"
android:layout_weight="0.06"
android:text="author"
android:textSize="10dp" />
</LinearLayout>
<LinearLayout
android:orientation="horizontal"
android:layout_width="match_parent"
android:layout_height="wrap_content">
<TextView
android:id="@+id/tv_price"
android:layout_width="wrap_content"
android:layout_height="wrap_content"
android:layout_margin="5dp"
android:text="price"
android:textSize="20dp" />
</LinearLayout>
<TextView
android:id="@+id/tv_time"
android:layout_width="wrap_content"
android:layout_height="wrap_content"
android:layout_margin="5dp"
android:text="time"
android:textSize="10dp" />
<View
android:layout_width="match_parent"
android:layout_height="10dp"
android:background="@android:color/holo_green_light"/>
</LinearLayout>
|

JAVA :MyBook
|
package com.example.app_cloud.po;

 public class MyBook {
   private long key;
   private String title;
   private String author;
   private int price;
   private long time;

  //這邊是要給 ArrayAdapter用的

 @Override
public String toString() {
   SimpleDateFormat f = new SimpleDateFormat("yyyy/MM/dd HH:mm:ss E");

   String data = String.format
   ("書名:%s\tkey:%d\n作者:%s\t價格:%d\n上架時間:%s"
   , title, key, author, price, f.format(new Date(time)));
   return data;
}

   public long getKey() {
       return key;
   }
    public void setKey(long key) {
       this.key = key;
   }
    public String getTitle() {
       return title;
   }
    public void setTitle(String title) {
       this.title = title;
   }

    public String getAuthor() {
       return author;
   }
    public void setAuthor(String author) {
       this.author = author;
   }
    public int getPrice() {
       return price;
   }
    public void setPrice(int price) {
       this.price = price;
   }
    public long getTime() {
       return time;
   }
    public void setTime(long time) {
       this.time = time;
   }
}
|
JAVA :Service_My_Book
|
package com.example.app_cloud.model;

 import com.example.app_cloud.po.MyBook;
import java.text.SimpleDateFormat;
import java.util.Date;

 public class Service_My_Book {

    //JSON中每一筆資料都是 MyBook,所以用型別是MyBook 集合去裝
   private MyBook[] service_myBooks;

   //建構子
   public Service_My_Book(MyBook[] myBooks) {
       this.service_myBooks = myBooks;
   }

    //需要資料就透過 Service_My_Book,不要伸手到Mybook中拿
   public String getKey(int postion) {
       return "書籤代碼= " + String.valueOf(service_myBooks[postion].getKey());
   }

    public String getTitle(int postion) {
       return "標題= " + service_myBooks[postion].getTitle();
   }

    public String getAuthor(int postion) {
       return "作者名稱= " + service_myBooks[postion].getAuthor();
   }

    public String getPrice(int postion) {
       return "販售的金額= "
              + String.valueOf(service_myBooks[postion].getPrice());
   }

    public String getTime(int postion) {
//創立一個format的物件
       SimpleDateFormat formatdate;
       formatdate= new SimpleDateFormat("yyyy/MM/dd HH:mm:ss E");

 //先取得時間
       Long time = service_myBooks[postion].getTime();

        String data = String.format(formatdate.format(new Date(time)));

        return "上架時間= " + data;
   }
}
|
JAVA :JasonAdapter
|
package com.example.app_cloud;

import android.content.Context;
import android.view.LayoutInflater;
import android.view.View;
import android.view.ViewGroup;
import android.widget.BaseAdapter;
import android.widget.TextView;
import com.example.app_cloud.model.Service_My_Book;
import com.example.app_cloud.myapp.MyApp;
import com.example.app_cloud.po.MyBook;

 public class JsonAdapter extends BaseAdapter {
   private Context context;
   private MyBook[] myBooks;
   private LayoutInflater layoutInflater;

    //建構子
   public JsonAdapter(Context context, MyBook[] myBooks) {
       this.context = context;
       this.myBooks = myBooks;
   }
    //size
   @Override
   public int getCount() {
       return myBooks.length;
   }
//item
   @Override
   public Object getItem(int i) {
       return myBooks[i];
   }
    //id
   @Override
   public long getItemId(int i) {
       return i;
   }

    @Override
   public View getView(int postion, View view, ViewGroup viewGroup) {
       ViewHolder viewHolder;

        //view == null
       if (view == null) {

            //如果view == null,我才創建一個新的view
            //避免下載一次 就創造一個View出來
           view = layoutInflater.from(context).inflate(R.layout.item, null);

            //如果view == null,我再findViewByid
           viewHolder = new ViewHolder();

        viewHolder.m_tv_time = (TextView) view.findViewById(R.id.tv_time);
        viewHolder.m_tv_title = (TextView) view.findViewById(R.id.tv_title);
        viewHolder.m_tv_author = (TextView) view.findViewById(R.id.tv_author);
        viewHolder.m_tv_price = (TextView) view.findViewById(R.id.tv_price);
        viewHolder.m_tv_key = (TextView) view.findViewById(R.id.tv_key);

            // 把viewHolider裝進標籤
           view.setTag(viewHolder);

        } else {
           //如果 !=null,我就標籤的Hoviewlider 取出
           viewHolder = (ViewHolder) view.getTag();
        }

       //setter 封裝 Service_my_book
       if(service_my_book==null) {
            service_my_book = new Service_My_Book(myBooks);
       }

        //取得model 並索取資料
    Service_My_Book service = MyApp.getService_my_book();

    viewHolder.m_tv_time.setText(service.getTime(postion));
    viewHolder.m_tv_title.setText(service.getTitle(postion));
    viewHolder.m_tv_author.setText(service.getAuthor(postion));
    viewHolder.m_tv_price.setText(service.getPrice(postion));
    viewHolder.m_tv_key.setText(service.getKey(postion));
        return view;
   }

        //Holder (避免每下載一次就findviewbyId,有效利用ListView緩存機制)
   public class ViewHolder {
       private TextView m_tv_time;
       private TextView m_tv_title;
       private TextView m_tv_author;
       private TextView m_tv_price;
       private TextView m_tv_key;
   }
}
|
JAVA :MainActivity
|
package com.example.app_cloud;
import android.content.Context;
import android.os.Bundle;
import android.os.Handler;
import android.support.v7.app.AppCompatActivity;
import android.widget.ArrayAdapter;
import android.widget.BaseAdapter;
import android.widget.ListView;
import com.example.app_cloud.po.MyBook;
import com.google.gson.Gson;
import com.squareup.okhttp.OkHttpClient;
import com.squareup.okhttp.Request;
import com.squareup.okhttp.Response;
import java.io.IOException;
public class MainActivity extends AppCompatActivity {
private Context context;
private ListView listView;
private MyBook[] collection_mybook;
private ArrayAdapter
|
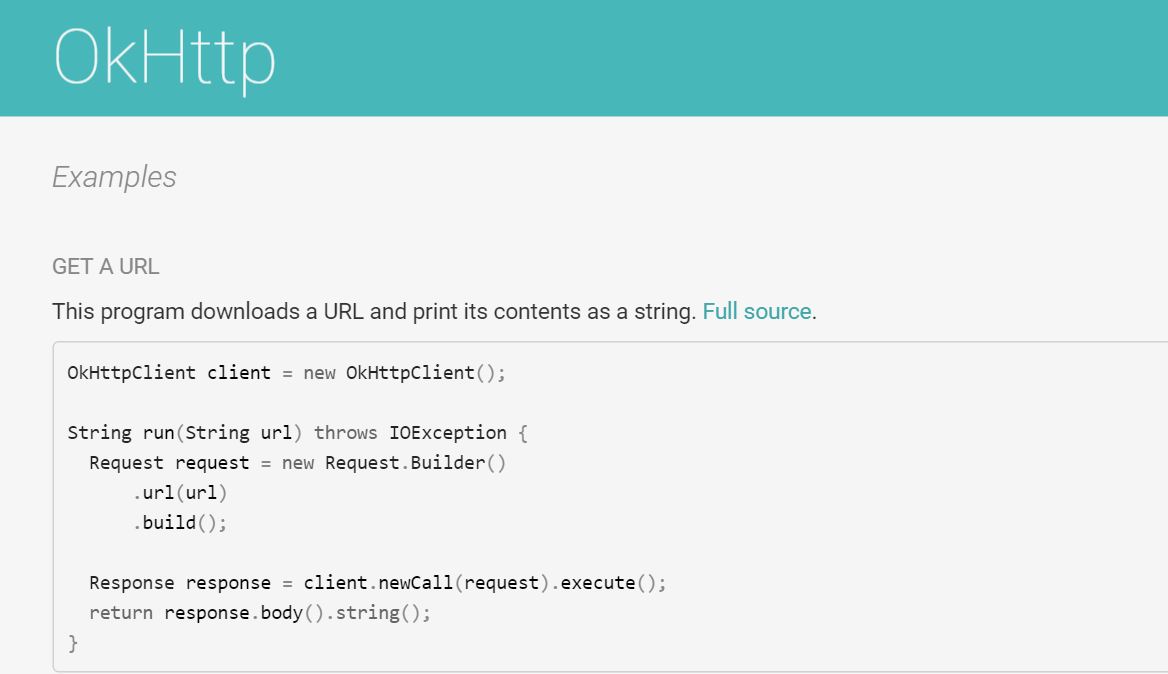 OkHttpClient client = new OkHttpClient();
String run(String url) throws IOException {
Request request = new Request.Builder()
.url(url)
.build();
Response response = client.newCall(request).execute();
return response.body().string();
}
//step3:創造出step2所要的工作內容
Runnable r = new Runnable() {
@Override
public void run() {
Gson gson = new Gson();
collection_mybook=gson.fromJson(myjson,MyBook[].class);
//第1種 Adapter
arrayadapter = new ArrayAdapter
OkHttpClient client = new OkHttpClient();
String run(String url) throws IOException {
Request request = new Request.Builder()
.url(url)
.build();
Response response = client.newCall(request).execute();
return response.body().string();
}
//step3:創造出step2所要的工作內容
Runnable r = new Runnable() {
@Override
public void run() {
Gson gson = new Gson();
collection_mybook=gson.fromJson(myjson,MyBook[].class);
//第1種 Adapter
arrayadapter = new ArrayAdapter