Google App Engine(四)
延續上一章節:
步驟1:新增
先在資料表中 新增一個資料,書名=android,作者=andy,價格=99999
再到GAE資料庫中查詢資料是否新增,再查看網頁中Json的格式。
步驟2:修改資料
書名=android→IOS,作者=andy,價格=99999→88888888
再到GAE資料庫中查詢資料是否修改,再查看網頁中Json的資料是否新增 。
步驟3:刪除資料表中的資料
再到GAE資料庫中查詢資料是否刪除,再查看網頁中的資料是否刪除。
本章運用到了:
MVC設計模式
Adapter接配線模式
BaseAdapter
ListView的 ViewHolider概念
本章目的:
1.與App進行互動
2.上一章節說道『查詢』、本章完成『新增』、『變更』、『刪除』功能
APP(前端)
簡述:因為程式碼太過於攏長,所以我們用片段的方法來介紹,
位置:mainActivity
Add_data_Thread 方法
簡述:用來增加資料的執行緒
//Add_data_Thread
public class Add_data_Thread extends Thread {
String add_url;
private String title;
private String author;
private String price;
//建構子,當被使用時 馬上導入這3個參數
public Add_data_Thread(String title, String author, String price) {
this.title = title;
this.author = author;
this.price = price;
}
// step1.這段程式碼由OKhttp所提供
// 分析 http 資料結構標準語法
// Url是再把網址放入 這時候會發送 request方法給伺服器
// 伺服器根據你要資料把資料用 response 回傳給你
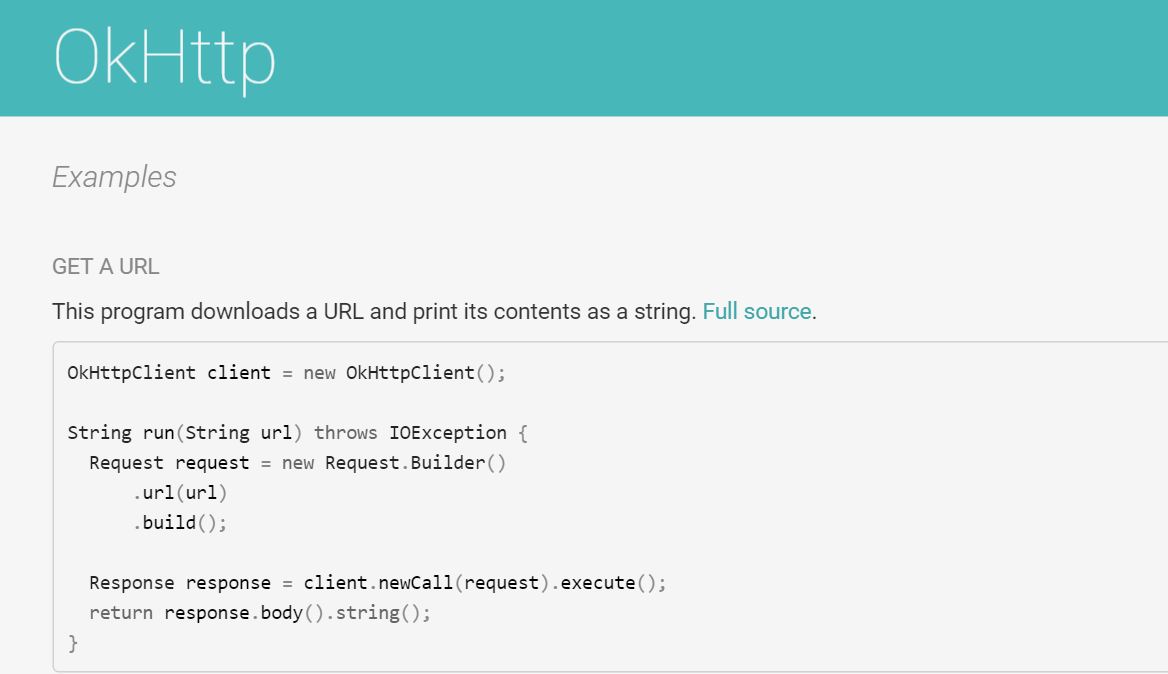 OkHttpClient client = new OkHttpClient();
String run(String url) throws IOException {
Request request = new Request.Builder()
.url(url)
.build();
Response response = client.newCall(request).execute();
return response.body().string();
}
Runnable r = new Runnable() {
@Override
public void run() {
Log.d("tag", "add successful");
}
};
@Override
public void run() {
try {
Log.d("tag", "http://pure-meridian-135923.appspot.com/add");
// 寫死的 先註解掉
// add_url = run("http://pure-meridian-135923.appspot.com/add");
String ur1 =
String.format("http://pure-meridian-135923.appspot.com/add?mtitle=%s&mauthor=%s&mprice=%s", title, author, price);
add_url = run(ur1);
runOnUiThread(r);
} catch (Exception e) {
}
}
}
OkHttpClient client = new OkHttpClient();
String run(String url) throws IOException {
Request request = new Request.Builder()
.url(url)
.build();
Response response = client.newCall(request).execute();
return response.body().string();
}
Runnable r = new Runnable() {
@Override
public void run() {
Log.d("tag", "add successful");
}
};
@Override
public void run() {
try {
Log.d("tag", "http://pure-meridian-135923.appspot.com/add");
// 寫死的 先註解掉
// add_url = run("http://pure-meridian-135923.appspot.com/add");
String ur1 =
String.format("http://pure-meridian-135923.appspot.com/add?mtitle=%s&mauthor=%s&mprice=%s", title, author, price);
add_url = run(ur1);
runOnUiThread(r);
} catch (Exception e) {
}
}
}
簡述:用來增加資料的執行緒
|
//Add_data_Thread
public class Add_data_Thread extends Thread {
String add_url;
private String title;
private String author;
private String price;
//建構子,當被使用時 馬上導入這3個參數
public Add_data_Thread(String title, String author, String price) {
this.title = title;
this.author = author;
this.price = price;
}
// step1.這段程式碼由OKhttp所提供
// 分析 http 資料結構標準語法
// Url是再把網址放入 這時候會發送 request方法給伺服器
// 伺服器根據你要資料把資料用 response 回傳給你
|
Updata_data_Thread 方法
簡述:用來變更資料的執行緒
//Updata_data_Thread
public class Updata_data_Thread extends Thread {

   private String add_url;
   private String key;
   private String title;
   private String author;
   private String price;

   // 建構子,因為後端要使用『key』指定改變資料,所以因曾一個參數
   public Updata_data_Thread(String key, String title, String author, String price) {
       this.key = key;
       this.title = title;
       this.author = author;
       this.price = price;
   }

 //OkHttp
 // step1.這段程式碼由OKhttp所提供
 // 分析 http 資料結構標準語法
 // Url是再把網址放入 這時候會發送 request方法給伺服器
 // 伺服器根據你要資料把資料用 response 回傳給你


   OkHttpClient client = new OkHttpClient();

   String run(String url) throws IOException {
       Request request = new Request.Builder()
               .url(url)
               .build();

       Response response = client.newCall(request).execute();
       return response.body().string();
   }
   Runnable r = new Runnable() {
       @Override
       public void run() {
           Log.d("tag", "updata successful");
           Toast.makeText(context, "updata successful", Toast.LENGTH_SHORT).show();
       }
   };
   @Override
   public void run() {
       try {

           Log.d("tag", "updata_run");

           //這邊比較複雜需要注意一下
           //網址中的 mkey、mtitle、mauthor、mprice 這參數 會對應到 App_cloud_backend
           String url =
                   String.format("http://pure-meridian-135923.appspot.com/updata?
mkey=%s&mtitle=%s&mauthor=%s&mprice=%s", key, title, author, price);

           add_url = run(url);
           runOnUiThread(r);
       } catch (Exception e) {
       }
   }
}
簡述:用來變更資料的執行緒
|
//Updata_data_Thread
public class Updata_data_Thread extends Thread {
private String add_url;
private String key;
private String title;
private String author;
private String price;
// 建構子,因為後端要使用『key』指定改變資料,所以因曾一個參數
public Updata_data_Thread(String key, String title, String author, String price) {
this.key = key;
this.title = title;
this.author = author;
this.price = price;
}
//OkHttp
// step1.這段程式碼由OKhttp所提供
// 分析 http 資料結構標準語法
// Url是再把網址放入 這時候會發送 request方法給伺服器
// 伺服器根據你要資料把資料用 response 回傳給你
|
Delete_data_Thread 方法
| 簡述:用來刪除資料的執行緒 |
//Delete_data_Thread
public class Delete_data_Thread extends Thread {
String url_Delete;
String key;
public Delete_data_Thread(String key)
{
this.key=key;
}
//OkHttp
// step1.這段程式碼由OKhttp所提供
// 分析 http 資料結構標準語法
// Url是再把網址放入 這時候會發送 request方法給伺服器
// 伺服器根據你要資料把資料用 response 回傳給你
|
Layout
item.xml 為baseadapter所用 上一章已介紹

簡述:當我按下 "CLICK"的時候 我會跳出
『add_form』這一個Layout 來新增資料。

<?xml version="1.0" encoding="utf-8"?>
<LinearLayout xmlns:android="http://schemas.android.com/apk/res/android"
android:layout_width="match_parent"
android:layout_height="match_parent"
android:orientation="vertical">
<EditText
android:text=""
android:hint="請輸入書名"
android:layout_margin="5dp"
android:id="@+id/ed_title"
android:layout_width="wrap_content"
android:layout_height="wrap_content" />
<EditText
android:text=""
android:hint="請輸入作者"
android:layout_margin="5dp"
android:id="@+id/ed_author"
android:layout_width="match_parent"
android:layout_height="wrap_content" />
<EditText
android:text=""
android:hint="請輸入價格"
android:id="@+id/ed_price"
android:layout_margin="5dp"
android:layout_width="match_parent"
android:layout_height="wrap_content" />
</LinearLayout>
當我按下主畫面每一個item的時候就會跳出
『updata_from』這一個Layout 來改變資料

<?xml version="1.0" encoding="utf-8"?>
<LinearLayout xmlns:android="http://schemas.android.com/apk/res/android"
android:layout_width="match_parent"
android:layout_height="match_parent"
android:orientation="vertical">
<EditText
android:enabled="false"
android:text=""
android:hint="KEY"
android:layout_margin="5dp"
android:id="@+id/ed_key"
android:layout_width="wrap_content"
android:layout_height="wrap_content" />
<EditText
android:text=""
android:hint="請輸入書名"
android:layout_margin="5dp"
android:id="@+id/ed_title"
android:layout_width="wrap_content"
android:layout_height="wrap_content" />
<EditText
android:text=""
android:hint="請輸入作者"
android:layout_margin="5dp"
android:id="@+id/ed_author"
android:layout_width="match_parent"
android:layout_height="wrap_content" />
<EditText
android:text=""
android:hint="請輸入價格"
android:id="@+id/ed_price"
android:layout_margin="5dp"
android:layout_width="match_parent"
android:layout_height="wrap_content" />
</LinearLayout>
『 activity_Main 』
<?xml version="1.0" encoding="utf-8"?>
<LinearLayout xmlns:android="http://schemas.android.com/apk/res/android"
xmlns:tools="http://schemas.android.com/tools"
android:background="@android:color/holo_green_light"
android:layout_width="match_parent"
android:layout_height="match_parent"
android:paddingBottom="5dp"
android:orientation="vertical"
android:paddingLeft="5dp"
android:paddingRight="5dp"
android:paddingTop="5dp"
tools:context="com.example.app_cloud.MainActivity">
<Button
android:onClick="onclick"
android:layout_width="wrap_content"
android:layout_height="match_parent"
android:text="Click"
android:id="@+id/button"
android:layout_weight="9" />
<ListView
android:layout_marginTop="20dp"
android:layout_width="match_parent"
android:layout_height="match_parent"
android:layout_weight="2"
android:id="@+id/listView"
android:layout_alignBottom="@+id/webView"
android:layout_alignParentLeft="true"
android:layout_alignParentStart="true" />
</LinearLayout>
Layout
item.xml 為baseadapter所用 上一章已介紹
|
將上述的方法 放入MainActivity 中
1. 先取得點擊目標的Mybook物件(已經有值)
再把Mybook的值 設定在Edtext中,之後再做修改
2. updata的基本概念(參數 要多一個key,後端才能指定修改)
package com.example.app_cloud;
import android.content.Context;
import android.content.DialogInterface;
import android.os.Bundle;
import android.os.Handler;
import android.support.v7.app.AlertDialog;
import android.support.v7.app.AppCompatActivity;
import android.util.Log;
import android.view.View;
import android.widget.AdapterView;
import android.widget.ArrayAdapter;
import android.widget.BaseAdapter;
import android.widget.EditText;
import android.widget.ListView;
import android.widget.Toast;
import com.example.app_cloud.po.MyBook;
import com.google.gson.Gson;
import com.squareup.okhttp.OkHttpClient;
import com.squareup.okhttp.Request;
import com.squareup.okhttp.Response;
import java.io.IOException;

public class MainActivity extends AppCompatActivity {
   //Context
   private Context context;

   //collection
   private MyBook[] collection_mybook;

   //View
   private ListView listView;
   private View add_view, updata_view;

   //adapter
   private ArrayAdapter arrayadapter;
   private BaseAdapter baseAdapter;

//Edittext
private EditText m_updata_ed_key;
private EditText m_ed_title, m_updata_ed_title;
private EditText m_ed_author, m_updata_ed_author;
private EditText m_ed_price, m_updata_ed_price;

   private Handler handler = new Handler();

   @Override
   protected void onCreate(Bundle savedInstanceState) {
       super.onCreate(savedInstanceState);
       setContentView(R.layout.activity_main);

       //findViewID
       finId();

       //3second run→ Show_data_Thread
       Runnable r = new Runnable() {
           @Override
           public void run() {

               //  執行查詢
               new Show_data_Thread().start();

               // 3秒鐘執行一次
               handler.postDelayed(this, 3000);
           }
       };

       handler = new Handler();
       handler.post(r);

       //避免程式碼過於肥大,我們將點擊item寫在這一個方法中
       onclick_itwm_view();
   }
   public void finId() {
       context = this;
       listView = (ListView) findViewById(R.id.listView);
   }
   public void add_view_finId() {

       add_view = View.inflate(context, R.layout.add_form, null);
       m_ed_title = (EditText) add_view.findViewById(R.id.ed_title);
       m_ed_author = (EditText) add_view.findViewById(R.id.ed_author);
       m_ed_price = (EditText) add_view.findViewById(R.id.ed_price);
   }
public void updata_view_findId() {

   updata_view = View.inflate(context, R.layout.updata_form, null);
   m_updata_ed_key = (EditText) updata_view.findViewById(R.id.ed_updata_key);
   m_updata_ed_title = (EditText) updata_view.findViewById(R.id.ed_updata_title);
   m_updata_ed_author = (EditText) updata_view.findViewById(R.id.ed_updata_author);
   m_updata_ed_price = (EditText) updata_view.findViewById(R.id.ed_updata_price);
}

  //onclick →Add_Mybook_Data (當我按下按鈕的時候 我就執行新增資料)
   public void onclick(View view) {

   add_view_finID();

       AlertDialog.Builder dialog = new AlertDialog.Builder(context);

       dialog.setTitle("新增 Book")
               .setView(add_view)
               .setNegativeButton("取消", null)
               .setPositiveButton("新增", new DialogInterface.OnClickListener() {
                   @Override
                   public void onClick(DialogInterface dialogInterface, int i) {

                       //用Log檢查一下打印出來的數據
                       Log.d("tag", "m_ed_title= " + m_ed_title.getText().toString());
                       Log.d("tag", "m_ed_author= " + m_ed_author.getText().toString());
                       Log.d("tag", "m_ed_price= " + m_ed_price.getText().toString());

                       //設定要帶入的參數,(從Edtext中取得)
                       new Add_data_Thread(
                               m_ed_title.getText().toString(),
                               m_ed_author.getText().toString(),
                               m_ed_price.getText().toString()
                       ).start();

                       // 寫死的RunAddWork() 先註解掉
                       // new Add_data_Thread().start();
                   }
               }).show();
   }
   public void onclick_itwm_view() {

       //點擊每一個item中會發師的事情 setOnItemClickListener
       listView.setOnItemClickListener(new AdapterView.OnItemClickListener() {
           @Override
           public void onItemClick(AdapterView adapterView, View view, int postion, long long) {

               //我們製作的Adapter的型別是 ,所以我們可利用型別去對應
               //再利用.getItemAtPosition(i) 去找到相對應的位置
               MyBook myBook = (MyBook) adapterView.getItemAtPosition(i);

               //Toast確認該筆的資料
               Toast.makeText(context, "" + myBook, Toast.LENGTH_SHORT).show();

               //findViewById
               View updata_view = View.inflate(context, R.layout.updata_form, null);
               updata_view_findId();

               //step1,取得原有資料,在Dialog對話框 開啟前並設定到Dialog Edtext中
               m_updata_ed_key.setText(myBook.getKey() + "");
               m_updata_ed_title.setText(myBook.getTitle());
               m_updata_ed_author.setText(myBook.getAuthor());
               m_updata_ed_price.setText(myBook.getPrice() + "");

               //顯示 Dialog 對話框
               AlertDialog alert = new AlertDialog.Builder(context)
                       .setTitle("修改標題")
                       .setView(updata_view)

                       //修改的選項(Positive)
                       .setPositiveButton("修改", new DialogInterface.OnClickListener() {
                           @Override
                           public void onClick(DialogInterface dialogInterface, int i) {

                               //使用者輸入資料後,再取得資料 並送出→ Updata_data_Thread
                               new Updata_data_Thread(
                                       m_updata_ed_key.getText().toString(),
                                       m_updata_ed_title.getText().toString(),
                                       m_updata_ed_author.getText().toString(),
                                       m_updata_ed_price.getText().toString()

                               ).start();
                           }
                       })

                       //取消的選項(Negative)
                       .setNegativeButton("取消", null)

                       //刪除的選項(Neutral)
                       .setNeutralButton("刪除", new DialogInterface.OnClickListener() {
                           @Override
                           public void onClick(DialogInterface dialogInterface, int i) {
                               new Delete_data_Thread( m_updata_ed_key.getText().toString()).start();
                           }
                       }).show();
           }
       });
   }
   //Show_data_Thread
   public class Show_data_Thread extends Thread { }
   //Add_data_Thread
   public class Add_data_Thread extends Thread { }
   //Updata_data_Thread
   public class Updata_data_Thread extends Thread { }
   //Delete_data_Thread
   public class Delete_data_Thread extends Thread { }
   }
}
1. 先取得點擊目標的Mybook物件(已經有值)
再把Mybook的值 設定在Edtext中,之後再做修改
2. updata的基本概念(參數 要多一個key,後端才能指定修改)
|
package com.example.app_cloud;
import android.content.Context;
import android.content.DialogInterface;
import android.os.Bundle;
import android.os.Handler;
import android.support.v7.app.AlertDialog;
import android.support.v7.app.AppCompatActivity;
import android.util.Log;
import android.view.View;
import android.widget.AdapterView;
import android.widget.ArrayAdapter;
import android.widget.BaseAdapter;
import android.widget.EditText;
import android.widget.ListView;
import android.widget.Toast;
import com.example.app_cloud.po.MyBook;
import com.google.gson.Gson;
import com.squareup.okhttp.OkHttpClient;
import com.squareup.okhttp.Request;
import com.squareup.okhttp.Response;
import java.io.IOException;
public class MainActivity extends AppCompatActivity {
//Context
private Context context;
//collection
private MyBook[] collection_mybook;
//View
private ListView listView;
private View add_view, updata_view;
//adapter
private ArrayAdapter
|
App_Cloud_backend(後端)
簡述:前端的基本設定已完成,後端的設定開始
新增 關鍵程式碼:
工廠取得: DatastoreService ds = DatastoreServiceFactory.getDatastoreService();
建立資料表: Entity book = new Entity("資料表名稱");
放入資料: book.setProperty( "輸入標題","輸入內容")
指定app端輸入的內容:req.getParameter(APP前端的指定參數 )........

AddServlet
package com.example.myapplication.backend;
import com.google.appengine.api.datastore.DatastoreService;
import com.google.appengine.api.datastore.DatastoreServiceFactory;
import com.google.appengine.api.datastore.Entity;
import java.io.IOException;
import java.util.Date;
import javax.servlet.http.HttpServlet;
import javax.servlet.http.HttpServletRequest;
import javax.servlet.http.HttpServletResponse;
public class AddServlet extends HttpServlet {
@Override
public void doGet(HttpServletRequest req, HttpServletResponse resp)
throws IOException {
resp.setContentType("text/plain");
//使用工廠獲取 DatastoreService
DatastoreService ds = DatastoreServiceFactory.getDatastoreService();
//創建一個資料表 name= book
Entity book = new Entity("Book");
//資料表 放入資料
book.setProperty("title", req.getParameter("mtitle"));
book.setProperty("author", req.getParameter("mauthor"));
book.setProperty("price", Integer.parseInt(req.getParameter("mprice")));
book.setProperty("time", new Date().getDate());
//寫死的資料我們就可以先註解掉
// book.setProperty("title","android");
// book.setProperty("author","Vincent");
// book.setProperty("price", new Random().nextInt(500) + 500);
// book.setProperty("time",new Date().getDate() );
//放入資料表
ds.put(book);
//DatastoreService對象並調用put方法寫入數據
resp.getWriter().println("add ok");
}
}
簡述:
工廠取得: DatastoreService ds = DatastoreServiceFactory.getDatastoreService();
Key取得指定位置:Key key = KeyFactory.createKey("資料表的名稱",APP前端的指定參數mkey )
記得型別是Long 記得轉型。

| AddServlet |
package com.example.myapplication.backend;
import com.google.appengine.api.datastore.DatastoreService;
import com.google.appengine.api.datastore.DatastoreServiceFactory;
import com.google.appengine.api.datastore.Entity;
import java.io.IOException;
import java.util.Date;
import javax.servlet.http.HttpServlet;
import javax.servlet.http.HttpServletRequest;
import javax.servlet.http.HttpServletResponse;
public class AddServlet extends HttpServlet {
@Override
public void doGet(HttpServletRequest req, HttpServletResponse resp)
throws IOException {
resp.setContentType("text/plain");
//使用工廠獲取 DatastoreService
DatastoreService ds = DatastoreServiceFactory.getDatastoreService();
//創建一個資料表 name= book
Entity book = new Entity("Book");
//資料表 放入資料
book.setProperty("title", req.getParameter("mtitle"));
book.setProperty("author", req.getParameter("mauthor"));
book.setProperty("price", Integer.parseInt(req.getParameter("mprice")));
book.setProperty("time", new Date().getDate());
//寫死的資料我們就可以先註解掉
// book.setProperty("title","android");
// book.setProperty("author","Vincent");
// book.setProperty("price", new Random().nextInt(500) + 500);
// book.setProperty("time",new Date().getDate() );
//放入資料表
ds.put(book);
//DatastoreService對象並調用put方法寫入數據
resp.getWriter().println("add ok");
}
}
|
UpdataServlet
package com.example.myapplication.backend;
import com.google.appengine.api.datastore.DatastoreService;
import com.google.appengine.api.datastore.DatastoreServiceFactory;
import com.google.appengine.api.datastore.Entity;
import com.google.appengine.api.datastore.Key;
import com.google.appengine.api.datastore.KeyFactory;
import java.io.IOException;
import java.util.Date;
import javax.servlet.http.HttpServlet;
import javax.servlet.http.HttpServletRequest;
import javax.servlet.http.HttpServletResponse;
public class UpdataServlet extends HttpServlet {
@Override
public void doGet(HttpServletRequest req, HttpServletResponse resp)
throws IOException {
resp.setContentType("text/plain");
////使用工廠獲取 DatastoreService
DatastoreService ds = DatastoreServiceFactory.getDatastoreService();
//取得一個KEY工廠
Key key = KeyFactory.createKey("Book", Long.parseLong(req.getParameter("mkey")));
//創建一個資料表才要Entity ,更新資料不用歐
// Entity book = new Entity("Book");
try {
//使用 ds.get(key) 先取得指定資料,再用req.getParameter取得數值
Entity book = ds.get(key);
book.setProperty("title", req.getParameter("mtitle"));
book.setProperty("author", req.getParameter("mauthor"));
book.setProperty("price", Integer.parseInt(req.getParameter("mprice")));
book.setProperty("time", new Date().getTime());
//放入資料表
ds.put(book);
} catch (Exception e) {
}
//DatastoreService對象並調用put方法寫入數據,
resp.getWriter().println("update ok");
}
}
| UpdataServlet |
package com.example.myapplication.backend;
import com.google.appengine.api.datastore.DatastoreService;
import com.google.appengine.api.datastore.DatastoreServiceFactory;
import com.google.appengine.api.datastore.Entity;
import com.google.appengine.api.datastore.Key;
import com.google.appengine.api.datastore.KeyFactory;
import java.io.IOException;
import java.util.Date;
import javax.servlet.http.HttpServlet;
import javax.servlet.http.HttpServletRequest;
import javax.servlet.http.HttpServletResponse;
public class UpdataServlet extends HttpServlet {
@Override
public void doGet(HttpServletRequest req, HttpServletResponse resp)
throws IOException {
resp.setContentType("text/plain");
////使用工廠獲取 DatastoreService
DatastoreService ds = DatastoreServiceFactory.getDatastoreService();
//取得一個KEY工廠
Key key = KeyFactory.createKey("Book", Long.parseLong(req.getParameter("mkey")));
//創建一個資料表才要Entity ,更新資料不用歐
// Entity book = new Entity("Book");
try {
//使用 ds.get(key) 先取得指定資料,再用req.getParameter取得數值
Entity book = ds.get(key);
book.setProperty("title", req.getParameter("mtitle"));
book.setProperty("author", req.getParameter("mauthor"));
book.setProperty("price", Integer.parseInt(req.getParameter("mprice")));
book.setProperty("time", new Date().getTime());
//放入資料表
ds.put(book);
} catch (Exception e) {
}
//DatastoreService對象並調用put方法寫入數據,
resp.getWriter().println("update ok");
}
}
|
DeleteServlet
package com.example.myapplication.backend;
import com.google.appengine.api.datastore.DatastoreService;
import com.google.appengine.api.datastore.DatastoreServiceFactory;
import com.google.appengine.api.datastore.Key;
import com.google.appengine.api.datastore.KeyFactory;
import java.io.IOException;
import javax.servlet.http.HttpServlet;
import javax.servlet.http.HttpServletRequest;
import javax.servlet.http.HttpServletResponse;
public class DeleteServlet extends HttpServlet {
@Override
public void doGet(HttpServletRequest req, HttpServletResponse resp)
throws IOException {
resp.setContentType("text/plain");
//使用工廠獲取 DatastoreService
DatastoreService ds = DatastoreServiceFactory.getDatastoreService();
//取得一個KEY工廠 ,後面參數的型別為lONG 記得轉型!
Key key = KeyFactory.createKey("Book", Long.parseLong(req.getParameter("mkey")));
try {
// 使用ds.delete(Key key),刪除指定資料
ds.delete(key);
resp.getWriter().println("delete ok");
} catch (Exception e) {
}
}
}
| DeleteServlet |
package com.example.myapplication.backend;
import com.google.appengine.api.datastore.DatastoreService;
import com.google.appengine.api.datastore.DatastoreServiceFactory;
import com.google.appengine.api.datastore.Key;
import com.google.appengine.api.datastore.KeyFactory;
import java.io.IOException;
import javax.servlet.http.HttpServlet;
import javax.servlet.http.HttpServletRequest;
import javax.servlet.http.HttpServletResponse;
public class DeleteServlet extends HttpServlet {
@Override
public void doGet(HttpServletRequest req, HttpServletResponse resp)
throws IOException {
resp.setContentType("text/plain");
//使用工廠獲取 DatastoreService
DatastoreService ds = DatastoreServiceFactory.getDatastoreService();
//取得一個KEY工廠 ,後面參數的型別為lONG 記得轉型!
Key key = KeyFactory.createKey("Book", Long.parseLong(req.getParameter("mkey")));
try {
// 使用ds.delete(Key key),刪除指定資料
ds.delete(key);
resp.getWriter().println("delete ok");
} catch (Exception e) {
}
}
}
|
沒有留言:
張貼留言